Chapter 09 · Part 1
Export Excel to CSV (Mac OS)
On a Mac, turning an Excel sheet into a CSV is just a Save As with the right file format. Here are the three steps.
Saving your sheet as CSV on Mac
These steps use Microsoft Excel for Mac. The wording may differ slightly between versions, but the flow is the same.
- 1
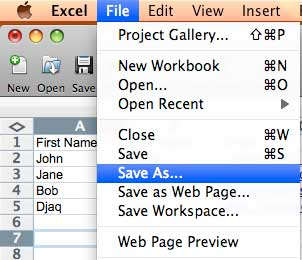
Open Save As
Open or create your spreadsheet, then choose File → Save As… from the menu bar.
- 2
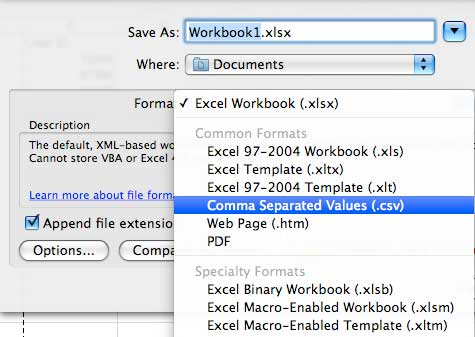
Choose the CSV format
From the File Format dropdown, pick a CSV option — choose Windows Comma Separated (.csv) if it’s offered, as it’s the most compatible with iSMS.

- 3
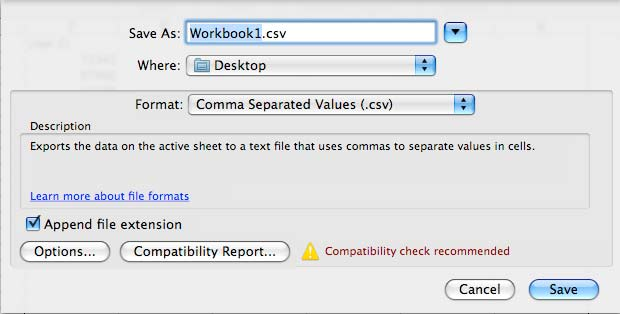
Name and save
Rename the file or pick a different location if you like, then click Save at the bottom right.
Your CSV is ready — continue to CSV Compose to upload and send.
Need help?
Our team is happy to assist with anything in this guide. Contact us →